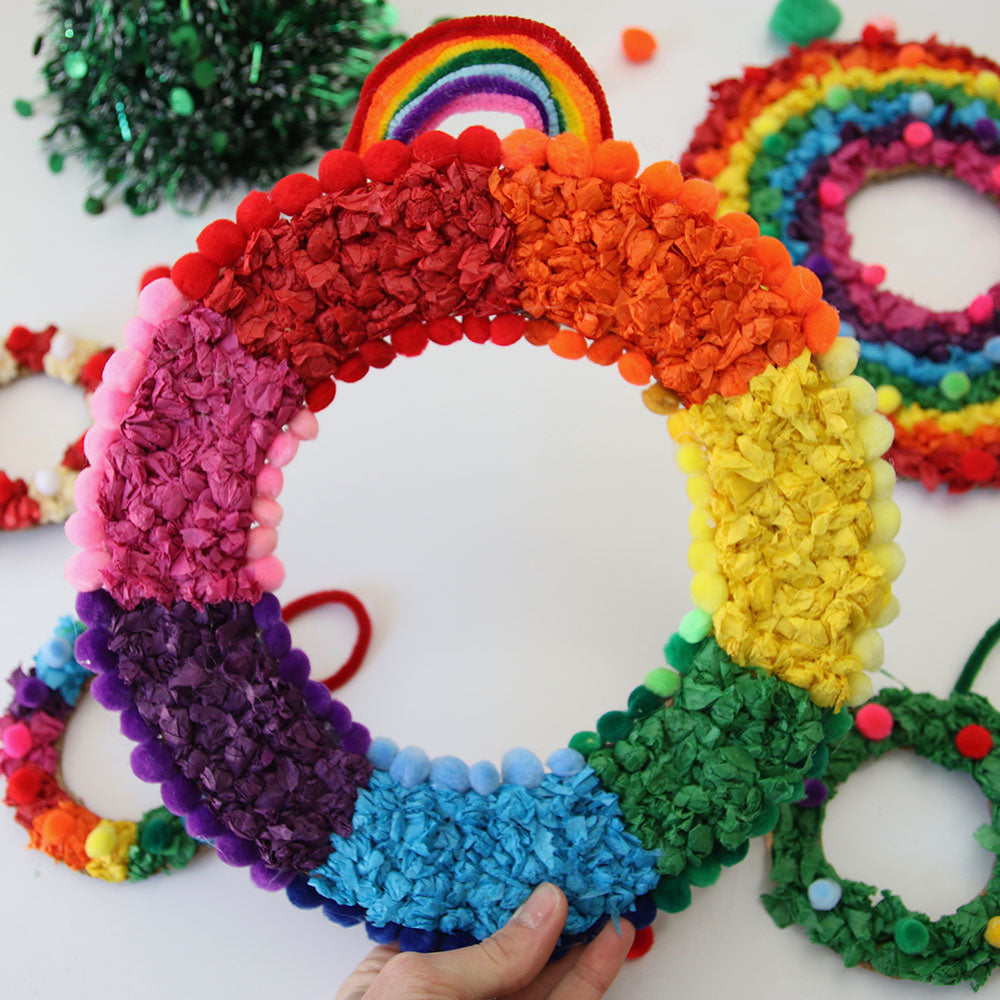
‘Tis the season for Christmas crafts! Keep your little ones entertained in the run up to the big day with this rainbow themed Christmas craft created by the wonderful duo behind @littlebuttonsdiaries, Laura & Tia. They share creative craft ideas for kids over on their blog Little Button Diaries.
Now, over to Laura & Tia…

EASY CHRISTMAS CRAFTS FOR CHILDREN
Rainbows have been the positive symbol of the year and it’s been lovely seeing a little colour when everything at times has felt a little bleak. So, we thought we would add technicolour to our Christmas this year with these colourful tissue paper wreaths. They are easy to make with kids as part of a festive family craft session and they’ll add a big splash of vibrancy to any room in your house! Pop the larger ones onto doors in your house and the mini versions can go on your Christmas tree, or even be hung in your kids’ bedrooms.
You will need:
- Tissue paper in rainbow colours
- PVA glue
- Corrugated card
- Pom-poms
- Pipe cleaners in rainbow colours
- Strong craft glue/ Sticky tape
HOW TO MAKE TISSUE PAPER WREATHS
- Begin by drawing the base for your wreath onto cardboard. Draw around a dinner plate, then a smaller plate or bowl inside the circle for a door sized wreath. For mini wreaths, you can draw around a cup and a lid. Remember the bigger the cardboard base the more tissue paper you’ll need to scrunch in step 3!

- As corrugated card can be a little tough to cut, ask an adult to cut out the wreath base. If you want your wreath to be in rainbow colours, measure and mark out in pencil seven equal sized segments around your wreath. Alternatively, you can take inspiration from our other designs below, or think up your own patterns!


- Now here’s the fun part! Rip up the tissue paper into small pieces (roughly squares 3 inches x 3 inches) and scrunch into balls. Then use PVA glue to stick them onto the cardboard base.


- Place the balls of tissue paper onto the cardboard base, one colour per segment. Make sure they are tightly bunched together so that you can’t see any cardboard underneath. Work your way around the wreath and leave the glue to dry.


- Embellish the wreath with pom-poms. You could glue them on top of the tissue paper or around the edge of the wreath onto the cardboard.


- To make the rainbow hanging loop, cut coloured pipe cleaners in half. Layer them in rainbow order and bend into an arch. Use strong craft glue to stick the pipe cleaners together at each end of the rainbow. Once the glue is dry, secure the pipe cleaners onto the back of the wreath at the top using glue or tape. For mini wreaths, you can simply use one pipe cleaner to create a hanging loop. If you don’t have pipe cleaners to hand you can always use string.


And that’s it! We recommend popping on the festive tunes whilst you make your rainbow wreath.

Thanks so much to Laura & Tia for sharing this fantastic Christmas craft for kids. Not only do these homemade wreaths make beautiful decorations, you could also gift them to family members. Granny or Granddad are bound to appreciate a handmade gift they can hang on their tree, year after year!
Take a look at our Great Little Gift Guide for Christmas gift inspiration.

